 DamaSight
W, feather & mosaic
Keep following the pattern end face E. A beautiful end pattern needs a route to the final display face.
W: turn, deform, repeat, expose.
Rotating the starting bar about X turns horizontal end-face layers upright. Compressing their edges changes their height and lets material move elsewhere. Uniform scaling would leave lines straight; nonuniform deformation produces the curved precursor. Confirm the actual end face rather than assuming a rotation guarantees a W.
Mike Turner’s sequence follows a welded stack, edge compression, cutting across X, repeating curved units with E aligned, and eventually slicing parallel to E. W-unit count and original A/B sheet count remain separate records. Other makers use different precursor preparation and cutting routes. [69] [70] [77]
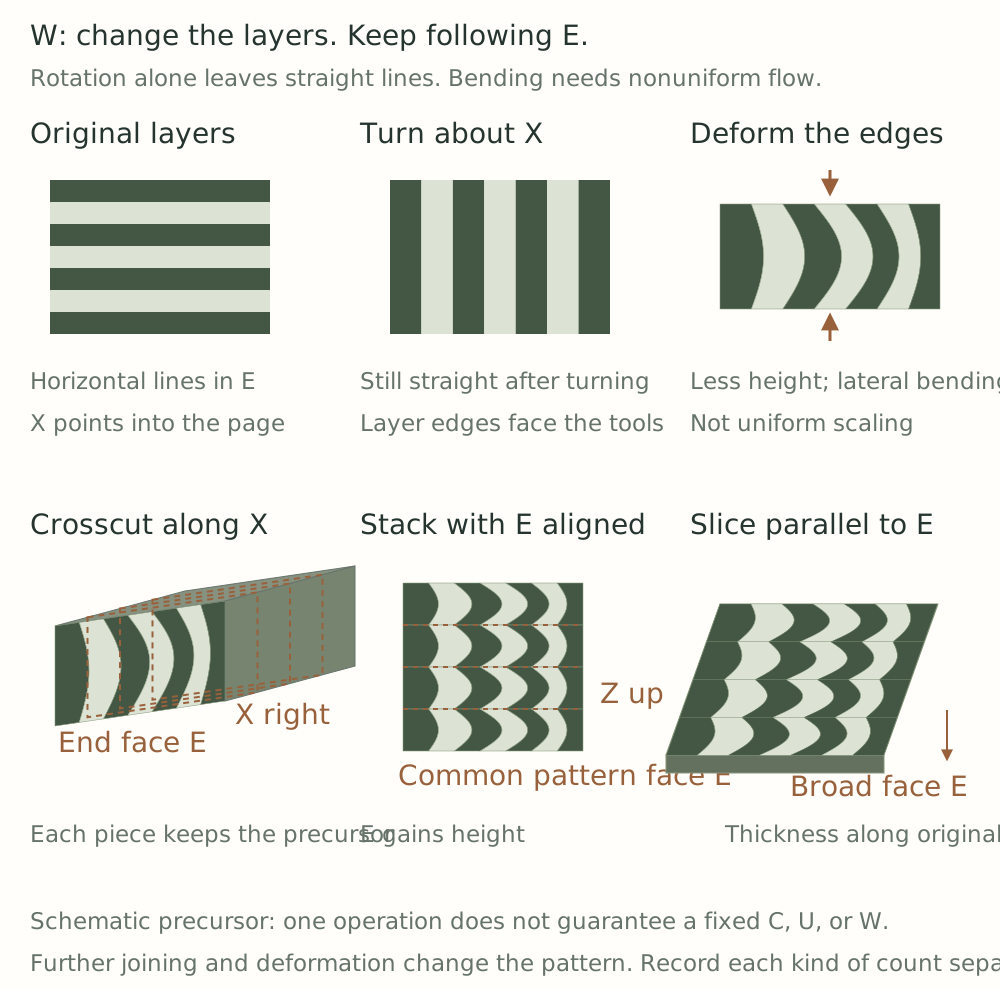
Will flattening a W-pattern bar automatically put the W on top?
No. The pattern still belongs to the tracked end face. Slicing, opening, turning, twisting, or another suitable route must bring that internal structure onto the intended display surface.
Feather: enlarge E, then drag the layers.
- Begin with a curved-layer precursor, such as a W bar.
- Cut short sections and stack them vertically with E facing the observer. Prepare and join the new contacts, creating a larger common pattern face.
- A hot wedge moving down the center drags nearby layers in its cutting direction. This local deformation contributes to the feather branches.
- Keep the fresh cut faces opposite each other and rejoin the halves in their original relationship. The intersection of the split plane and E becomes the central shaft.
Kyle Royer’s account describes tall stacking, the W face orientation, hot splitting, rejoining, and cautious drawing out. A straight cold saw cut removes material but does not supply the same layer drag. [71]
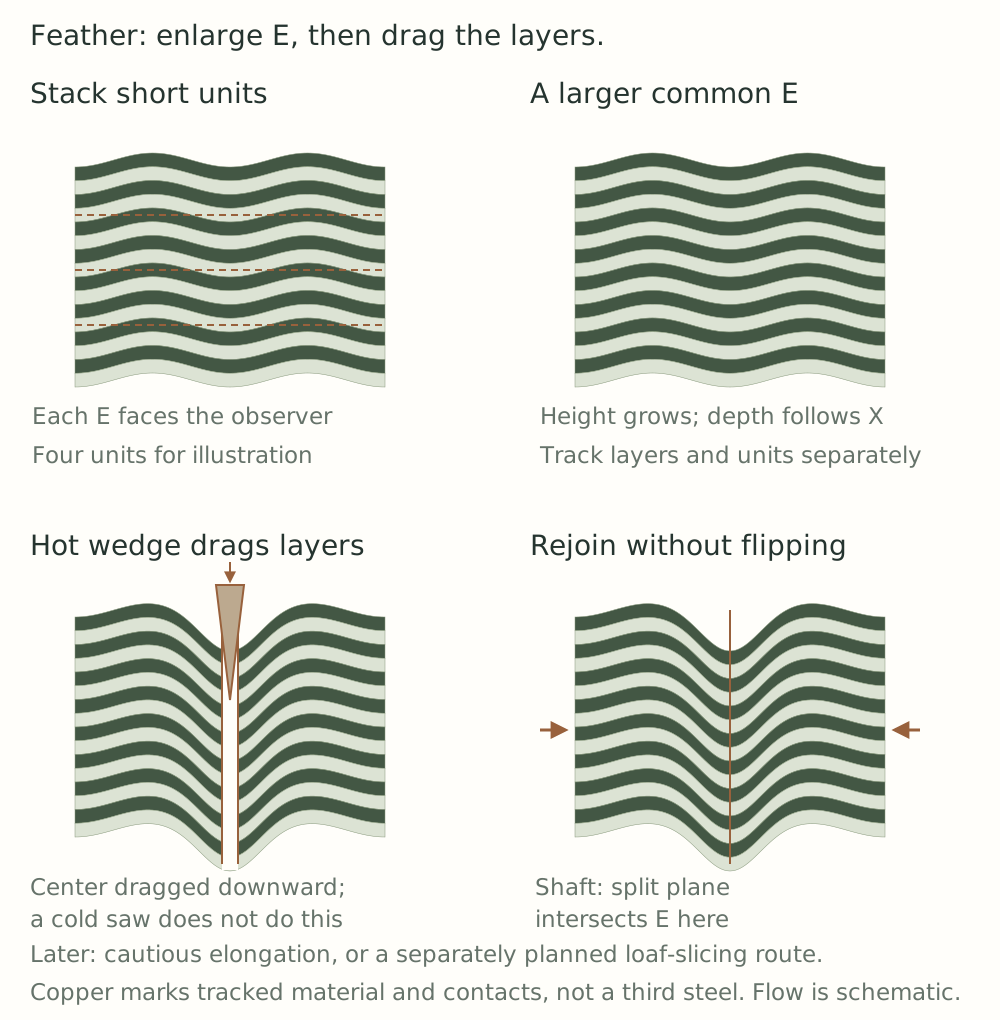
Keep subsequent routes distinct: cautious elongation is one route; Bruce Bump and Ed Caffrey also describe approaches that form a larger patterned loaf and slice parallel to E. Do not combine different authors’ later steps into a single supposedly validated recipe. [72] [75]
Mosaic: arrange units on E.
Use a sound precursor’s end pattern as a unit. Number pieces cut across X, keep their X axes parallel, rotate the patterns within E as planned, and assemble across the width and height of E. Original layers and new unit seams are different structures. The result is still a patterned bar requiring a display route. [25] [32]
Tile: expose E and place slices side by side.
Cut perpendicular to X so the slice’s broad faces are parallel to E and its thickness follows original X. Turn the slices so their patterned faces share one plane, then join their edges to enlarge a plate. This is side-by-side assembly, rather than stacking all the broad faces into a tall billet.
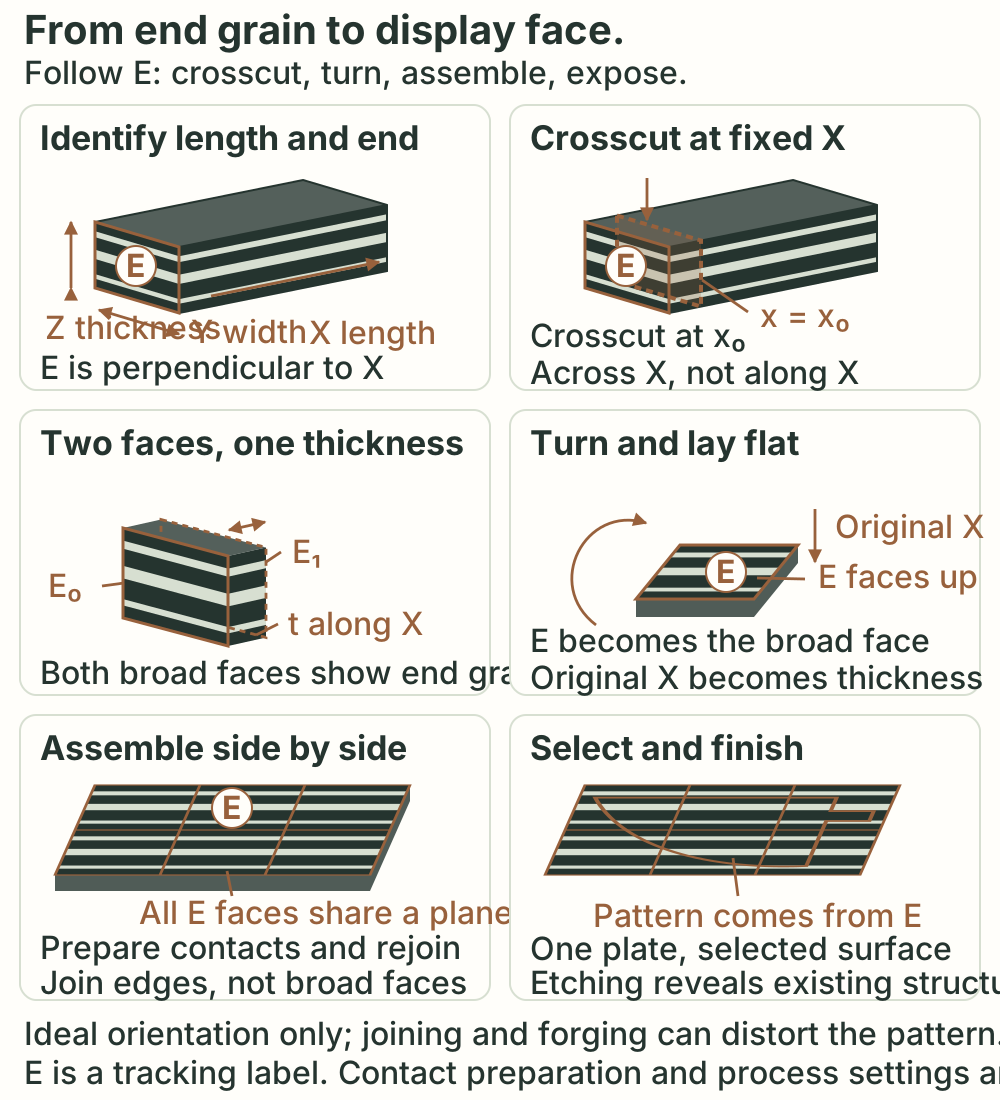
Loaf: enlarge E, then slice a broad plate.
Build a larger common E by assembling units or stacking appropriately. The overall depth follows X. Slice parallel to E, with plate thickness along X, then choose the intended length and outline within that face. Simply lengthening the bar along X does not enlarge E. [70] [72] [75]
Accordion: turn connected segments by opening them.
Plan alternating cuts from opposite sides along X, retaining connecting bridges. During hot opening, successive legs turn, bringing the former end-pattern direction into a new broad face. Adjacent motifs can alternate orientation, and bridges experience extra deformation and possible tearing. It is not distortion-free texture repetition. [73] [78]
Jelly roll and basketweave.
Rolled layers or alternating horizontal and vertical units first establish an end-face structure. They still need a suitable tile, loaf, opening, or other display route. The pattern name cannot replace a map of material connections and face orientation. [25] [58]
When studying a finished pattern, ask: where did the original layers begin; which operation changed them; where did the pattern first appear; how was that face enlarged or exposed; and how deeply does the final surface cut?
The Pattern Notebook · 10 of 18Visual learning. Real-world results vary.